Step-by-step Setup
This tutorial will describe setting up Cirrus SR22 in an empty Unity scene. The end result scene of the guide is included in the project and is named TutorialScene.
Cirrus SR22 model can be found under NWH ⇒ Aerodynamics ⇒ Models directory.
Reading the Airfoil documentation before starting the aircraft setup is highly recommended
Scene Setup
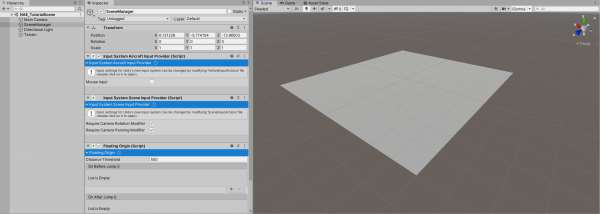
- Create a new empty
Scene.
- Create a new empty
GameObjectand name it SceneManager.
- Attach
InputSystemAircraftInputProviderandInputSystemSceneInputProvider- these will handle the user input.
- Attach
ShiftingOriginto SceneManager - more about shifting origin here.
- Add a
Terrainto the scene and position it at [-500, 0, -500] to center it.
Aircraft Controller
- Drag NWH ⇒ Aerodynamics ⇒ Models ⇒ Cirrus SR22.fbx into the middle of the newly created scene.
- Select all the colliders in the hierarchy (Cirrus SR22 ⇒ Colliders) and disable/untick
MeshRendereron them. AddMeshColliderto all four. It is important that a Rigidbody has at least one collider.
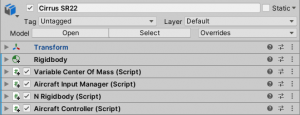
- Add
AircraftControllerto the parent object (Cirrus SR22 in this case). This will add other required components automatically.
- In the
Variable Center Of Massinspector adjust theBase Massto 1000 and set theCenter Of Mass Offsetto [0, -0.18, 0.9].
- Untick
Use Default Inertiaand adjust theDimensionsfield if required. Dimensions are displayed as gizmo lines. Red for width, green for height and blue for length. After adjusting the dimensions clickUpdate Inertia Tensor.
That is it for the core aircraft setup. The next step is making the aircraft fly.
Cameras
- Create an empty GameObject that is a child of Cirrus SR22 and call it Cameras.
- Attach
CameraChangercomponent to the newly created object.
- Create a new
Cameraand parent it to the Cameras object and addCameraMouseDragcomponent to it.
- Adjust the
Distancefield ofCameraMouseDragto 10.
- Press play and check if the camera works properly. LMB to rotate, RMB to drag.
Airfoils
- Follow the setup guide on Airfoil page to set up Cirrus SR22 ⇒ FlightSurfaces.
- Follow the setup guide on ControlSurfaces page to set up Cirrus SR22 ⇒ FlightControlSurfaces.
- Press play. Try pressing W and S to test out the elevators, A and D to test the ailerons and Q and E to test the rudder.
- Place the aircraft at the height of 1000 meters above terrain and press play. Let the aircraft gain some speed and try controlling it using WASD.
Tips:
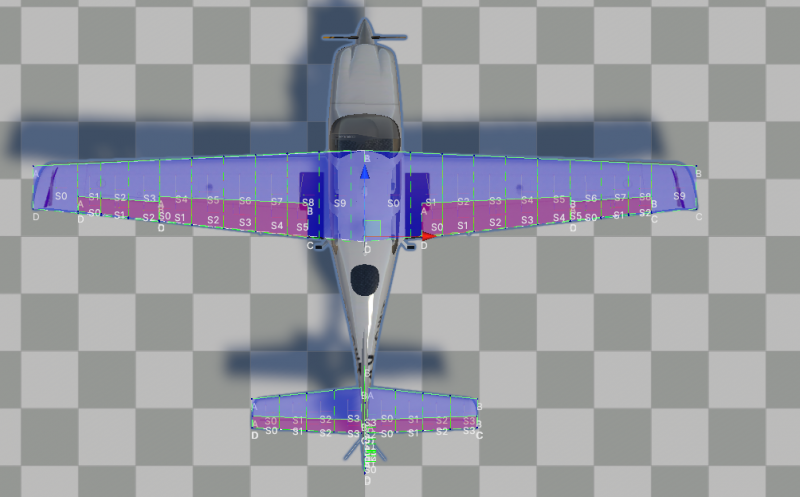
- When setting up an aircraft the wing
Airfoils should extend up to roughly the centerline of the aircraft as in the image above. - Airfoils should cover the control surfaces belonging to them.
To test out the setup place the aircraft 500m above the ground and press play. It should slowly tip forward and gain speed.
Once the Airfoils are set up as per the instructions above the aircraft should look like this:
Aerodynamic Drag Objects
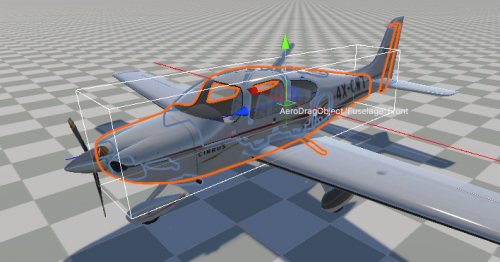
Besides airfoils aircraft also have objects that contribute little or nothing to lift, but do cause drag. In NWH Aerodynamics these can be set up using AerodynamicDragObject.
- Attach
AerodynamicDragObjectcomponent to the Fuselage object.
- Adjust the
CenterandDimensionsso that the box gizmo roughly matches the shape of the fuselage.
Landing Gear
After pressing play, currently the aircraft drops to the ground. To prevent this we need to add the landing gear.
- Add
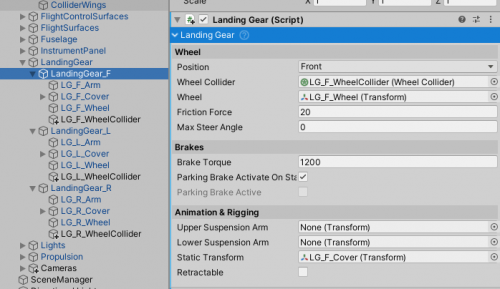
LandingGearcomponent to LandingGear_F, LandingGear_L and LandingGear_R.
- Adjust the
Positionfield to match the position of the landing gear.
- Duplicate LG_F_Wheel, LG_L_Wheel and LG_R_Wheel and rename them to LG_F_WheelCollider, LG_L_WheelCollider and LG_R_WheelCollider. Remove
MeshFilterandMeshRendererfrom the duplicated objects. These will act as holders forWheelCollider.
- Drag the duplicated objects so they are slightly above the wheels.
- Attach
WheelColliderto all three duplicated objects and adjust theRadiusfield until the gizmo matches the wheel size.
- Press play. The aircraft should not stand on the landing gear.
- Assign the created
WheelCollidertoWheel Colliderfield ofLandingGearcomponent added in first step. Also assign the corresponding wheel meshes to theWheelfield (LG_F_Wheel to LandingGear_F, etc.).
- Set the
Max Steer Angleto 10 for the LandingGear_F. This value can be set to 0 for wheels that do not steer, a positive value for normal steering, or a negative value for inverse steering (e.g. rear wheel).
- Assign the LG_F_Cover to the
Static Transformfield.
The landing gear for Cirrus SR22 is now set up. For more details on LandingGear check out this page.
Propulsion
The final step to setting up a functional aircraft is adding propulsion.
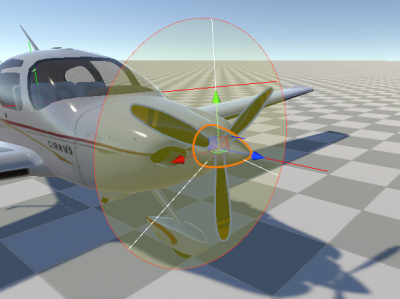
Cirrus SR22 is propelled by a piston engine connected to a variable-pitch propeller so PistonEngine and PropellerPropulsor will be used.
- Under Propulsion create a new empty GameObject called Engine. This object will contain all the engine-related components.
- Add
PistonEngineto the Engine object and set theMax Powerto 400 andStarter Torqueto 150.
- Add
PropellerPropulsorthe the Propeller object and assign it to thePropulsorsfield ofPistonEngine.
- If needed adjust the
Thrust PointandThrust Directionof thePropellerPropulsor.
- Since Cirrus SR22 has a variable pitch propeller tick
Variable Prop Pitch. Also tickAuto Prop Pitch.
To test the propulsion enter play mode and hold the T key for 2 to 3 seconds to start the engine. Afterwards, press F4 to increase the throttle to 100%. After gaining some speed the aircraft will be able to take off.
Sound
The aircraft is now fully functional but is lacking sound.
- Add
AircraftSoundManagerto the aircraft.
- Attach
EngineStartingAircraftSoundComponentandEngineRunningAircraftSoundComponentto the Engine object.
- Attach
WindAircraftSoundComponentandCrashAircraftSoundComponentto the Cirrus SR22 object. These can be placed anywhere on the aircraft.
Press play to test out the sounds.
Readouts
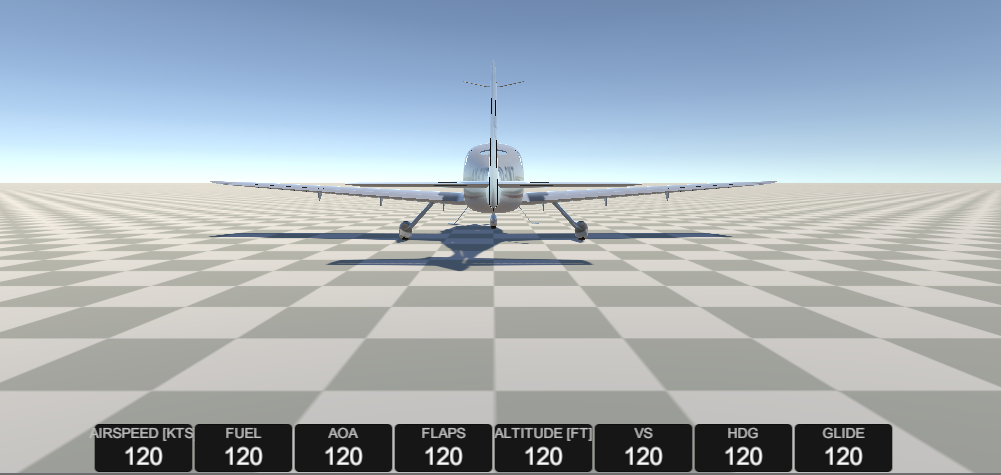
For testing purposes a DemoReadouts component can be helpful as it shows the basic flight data. This step is optional but recommended.
- Create a new UI
Canvasand create a childPanel.
- Adjust the panel so that it covers the whole canvas and remove the background
Image.
- Attach
DemoRedoutsto the panel and set theReadout Prefabfield to NWH/Aerodynamics/Scripts/AircraftController/Demo/Readout.prefab.
- Add
Grid Layout GroupwithCell Sizeof [100, 50] to the panel.
- Add Cirrus SR22 to the
Target AC.
Pressing play will now produce a row of basic flight data readouts.
Wrapping Up
The basic aircraft setup is now finished. For steps on setting up other optional aspects of the aircraft such as lights, instruments and fuel check out their respective pages:
